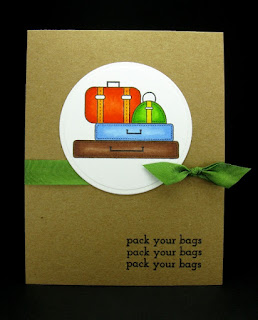
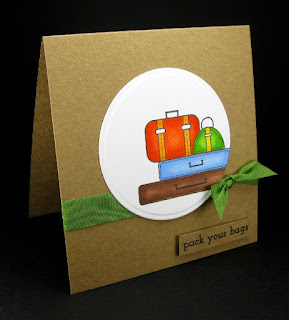
Today I wanted to share with you a few tips to really get the most out of your stamps.
I know many crafters out there are working on a tight budget, so being able to stretch your supplies can be a big help.
The clean designs in the Market Street Stamps line are so versatile and really lend themselves to paper piecing and coloring, which can get you a lot of different looks with just one stamp.
The clean designs in the Market Street Stamps line are so versatile and really lend themselves to paper piecing and coloring, which can get you a lot of different looks with just one stamp.
In addition to just coloring or paper piecing, don't forget what you can do with those great Market Street Stamps sentiments. Stamp them multiple times to really draw extra attention:
You can also mask the sentiments (to remove some of the words and create a new sentiment) or combine some words from multiple sentiments to create your own.
To change up the look of your stamped images, sometimes it just takes a little change in perspective. Try stamping off-center (or die-cutting off-center) as I've done here:
If you want to really change things up, instead of paper piecing to add patterns you can add your own doodles and designs with a pen.
These are just a few ways you can get some extra mileage from your Market Street Stamps stamp sets.
For these three examples I've used the same supplies: stamps, ink, markers, cardstock, and ribbon. Just think of how many more looks you can create by changing the color scheme or adding in various patterned papers.
I'd love to hear if you have any other tips on how your stretch your supplies!
Thanks for stopping by today!
Supplies:
Cardstock: Discount Cardstock (Brilliant White 130#); The Paper Company (Kraft);
Stamps: Market Street Stamps (Make A Memory, Bon Voyage);
Ink: Memento (Tuxedo Black); Ranger (Archival - Jet Black);
Cardstock: Discount Cardstock (Brilliant White 130#); The Paper Company (Kraft);
Stamps: Market Street Stamps (Make A Memory, Bon Voyage);
Ink: Memento (Tuxedo Black); Ranger (Archival - Jet Black);
Markers: Copic (YR68, YR18, E25, E57, YG25, YG17, B21, B23, Y38, Y08);
Memento (Tuxedo Black);
Ribbon: Ribbon Carousel (Vintage Seam Binding);
Ribbon: Ribbon Carousel (Vintage Seam Binding);
Dies: Spellbinders (Circles - Large);
Tools: Fiskars (Trimmer, Scissors); Scor-Pal (Scoring Board);
Tools: Fiskars (Trimmer, Scissors); Scor-Pal (Scoring Board);


7 comments:
Good ideas, Tifany. I really like your doodled version! Makes it that much more individual.
wow these are awesome...I love the one with the bags that have design....so fun...
These tips are wonderful. Very simple, but effective things you can do to spruce up a design. Thanks for sharing them on the blog today, Tifany! :)
Awesome!Fabulous job!
I love these and what a cute way to decorate the luggage set. I LOVE it! Hugs- Glora
What a lovely card Tiffany! Love the image and the beautiful colours :)
No ideas to add. Just want to tell you how wonderfully creative I think all of your cards are!
Post a Comment